Posts

Showing posts with the label Archaeology

Merchant ship sails

Image
And now for something completely different...   So my very clever husband scratch-built a merchant navy ship from the 1600's from bits of cardboard and wooden coffee stirrers. Naturally, he also needed some sails for it. Fabric, yarn and thread are not quite his medium of choice, so he asked me to rustle up some sails. They're made of double layers of uncoloured natural linnen cut out of some old trousers I hadn't worn for years, fastened to the mast with some embroidery yarn. Because of the double layers it all looks a little chunky, but that's usually the case with scale models anyway (I've been told). Please see his blog for a complete three-part story of how he built the ship!

Archaeorumi II: Prismatic bottle (free pattern)

Image
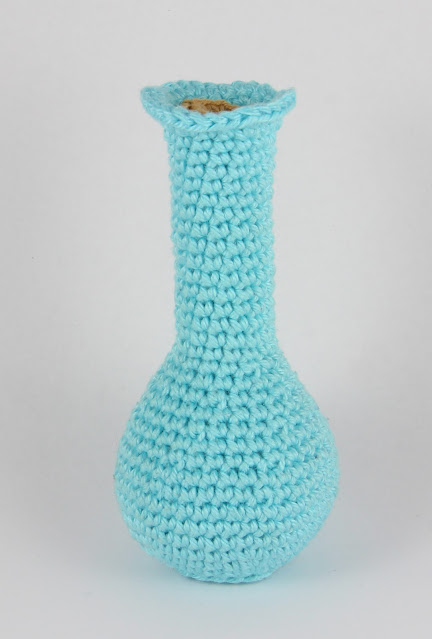
The second installment in what I've decided to call my archaeorumi are these miniature prismatic bottles. These square bottles in blue glass are a staple in provincial-Roman burials, where they are often found in groups of four as part of lavish dining sets that would include plates, cooking ware, cups and cooked meals for the deceased. Although I've never excavated one myself (such rich burials are quite rare!), I've always had a strange fondness for their shape and their insistence on appearing in sets of four. I'm easily amused.   The bottle on the left was made freestyle while watching telly and I find the mouth a little bit too small. For the bottle on the right, I tried to correct that and I like the shape much better. But as ever, there is great variety in prismatic bottles in the archaeological record and both versions resemble the glass originals equally well (or not). I've used cotton SMC Catania yarn, suitable for a 2.00-2.50mm hook. Prismatic bottle 1: S...

Archaeorumi I: Unguentaria

Image
Right, so I appreciate that this might be a little too niche for most people, but I've been trying to design archaeologically themed amigurumi. In my day to day life, I work as an archaeologist, mostly on finds (little field work for me these days) and I specialise in Roman pottery and small finds.  Roman glass isn't something I know an awful lot about, especially because it is so rare to find, let alone in a complete state. I have always found unguentaria quite charming though, the little medicine bottles that contained oils, make-up and other items used for dressing and treating the body. There are some really fun studies out there that did chemical analysis on remaining contents found in some of these Roman bottles and I've always dreamed of recreating the make-up recipes that Ovidius wrote up in his Medicamina Faciei Femineae (the book shown in the picture). Just a shame that almost all recipes contain things we now know are terribly toxic. Like lead :-) And how on eart...

Archaeorumi I: Unguentarium type 2

Image
Unguentarium type 2: Start a magic ring in green. R1. Sc 6 into the magic ring (6) R2. Sc2 into every stitch (12) R3. Sc2 in every 2nd stitch (18) R4. Sc2 in every 3rd stitch (24) R5. Sc2 in every 4th stitch (30) R6-9. Sc into every stitch (30) R10. Sc2tog every 9th and 10th stitch (27) R11. Sc into every stitch (27) R12. Sc2tog every 8th and 9th stitch (24) R13-14. Sc into every stitch (24) R15. Sc2tog every 7th and 8th stitch (21) R16-17. Sc into every stitch (21) R18. Sc2tog every 6th and 7th stitch (18) R19-20. Sc into every stitch (18) R21. Sc2tog every 5th and 6th stitch (15) R22-23. Sc into every stitch (15) Finish round 23 with a slip stitch.  R24. Ch 1, 2hdc in every stitch (30) Finish round 24 with a slip stitch and fasten off. Weave in ends.  Small stopper: Start a magic ring in contrasting colour.  R1. Sc6 in magic ring (6) R2. Sc2 in every stitch (12) R3. In back loops only, sc in every stitch (12) R4. In back loops only, sc in every stitch (12)  R5. Sc2...

Archaeorumi I: Ungentarium type 1

Image
Ungentarium type 1: Start a magic ring in light blue  R1. Sc6 in magic ring (6) R2. Sc2 in every stitch (12) R3. Sc2 in every 2nd stitch (18) R4. Sc2 in every 3rd stitch (24) R5. Sc2 in every 4th stitch (30) R6. Sc2 in every 5th stitch (36) R7. Sc2 in every 6th stitch (42) R8. In back loops only, sc in every stitch (42) R9-11. Sc in every stitch (42) R12. Sc2tog every 13th and 14th stitch (39) R13. Sc2tog every 12th and 13th stitch (36) R12. Sc2tog every 11th and 12th stitch (33) R13. Sc2tog every 10th and 11th stitch (30) R14. Sc2tog every 9th and 10th stitch (27) R15. Sc2tog every 8th and 9th stitch (24) R16. Sc2tog every 7th and 8th stitch (21) R17. Sc2tog every 6th and 7th stitch (18) R18. In front loops only, sc in every stitch (18) Weave a separate length of thread through the back loops and pull. Tie off.  R19-31. Sc in every stitch (18) R32. 2dc in the first 17 stitches. In the last, crochet 1 dc and hdc. Close with a slip stitch and fasten off.  Weave in ends....

Archaeorumi I: Unguentarium type 3

Image
Unguentarium type 3:  Start a magic ring in light blue  R1. Sc6 in magic ring (6) R2. Sc2 in every stitch (12) R3. Sc2 in every 2nd stitch (18) R4. Sc2 in every 3rd stitch (24) R5. In back loops only, sc in every stitch (24) R6. Sc2 in every 4th stitch (30) R7. Sc2 in every 5th stitch (36) R7. Sc2 in every 6th stitch (42) R8-11. Sc in every stitch (42) R12. Sc2tog every 6th and 7th stitch (36) R13. Sc in every stitch (36) R14. Sc2tog every 5th and 6th stitch (30) R15. Sc in every stitch (30). Start filling the body.  R16. Sc2tog every 4th and 5th stitch (24) R17. Sc in every stitch (24) R18. Sc2tog every 3rd and 4th stitch (18) R19. Sc in every stitch (18) R20. Sc2tog every 5th and 6th stitch (15) R21-35. Sc in every stitch (15) R36. Sc2 in every 5th stitch (18) R37. Sc2 in every 3rd stitch (24) R38. Sc2 in every 4th stitch (30). Fasten off with a slip stitch and weave in tail.  Small stopper: Start a magic ring in contrasting colour.  R1. Sc6 in magic ring (6) ...

Roman legionary soldier

Image
Some time ago, I changed PhD supervisors, which was a massive development for me. I wanted to thank my outgoing supervisor for all their help and advise and spent some time thinking of a suitable, meaningful present. Seeing as we're both Roman archaeologists specialised in military sites, I settled on the idea of making a Roman legionary amigurumi (which upon receiving, they promptly christened Marcus).  This is the end result: Marcus the Roman legionary, finished project Marcus' design really is a mix of two patterns, one written by Lucy Collins and the other by Laura Wilson Designs . The first is for a very small and stylised Roman soldier, while the other is for a relatively large and very detailed Spartan warrior. It took some time adapting and matching the two patterns, picking bits of one or the other and improvising the bits in between to arrive at a "cohesive" doll that looked right.  Marcus the Roman legionary, finished project I'm extremely happy with t...

Napoleon Bonaparte (free pattern)

Image
A while ago, I saw this marvelous felt rendering of Napoleon Bonapart by the designer deridolls on DeviantArt and I knew I had to make a crochet version in response. This little doll can be made from small left-over bits of yarn, in this case SMC Catania cotton in the colours navy blue (124), yellow (280), dark brown (157), white (106), pink (246) and soft apricot (263) with 6mm. safety eyes, a 2.00mm hook, some fiberfill stuffing and a small length of pipecleaner.  Head: In skin colour, start a magic ring, R1. sc6 in the ring (6) R2. 2sc in every stitch (12) R3. 2sc in every 2nd stitch (18) R4. 2sc in every 3rd stitch (24) R5. 2sc in every 4th stitch (30) R6. 2sc in every 5th stitch (36) R7-11. sc in every stitch (36) R12. sc2tog every 5th and 6th stitch (30) R13. sc2tog every 4th and 5th stitch (24) R14. sc2tog every 3rd and 4th stitch (18)   Put in the safety eyes between rounds 8 and 9, around 2 stitches apart. Stuff the head. ...

Tiger I tank

Image
Many years ago, my husband had these slippers in the shape of Tiger I tanks (he's a big history buff). They were crocheted according to a pattern by the wonderfully named designer Miligurumis and they were adorable, but slightly lethal when walking up stairs. Especially the floppy gun was a menace (we lived in a house with a winding staircase at the time).  They have long since worn out and recently he asked me if I could adapt the pattern into an amigurumi. The short answer is that I clearly couldn't, because although the pattern is very clear and not especially difficult, using a finer yarn and covering up the parts where the foot is supposed to go threw the whole pattern out of wack. So in the end, I only used Miligurumis' pattern for the wheels    It is weirdly cute, though, as cute as a weapon of war can be anyway. And I'm sure, like the slippers it would make an excellent present for a modern history enthusiast.