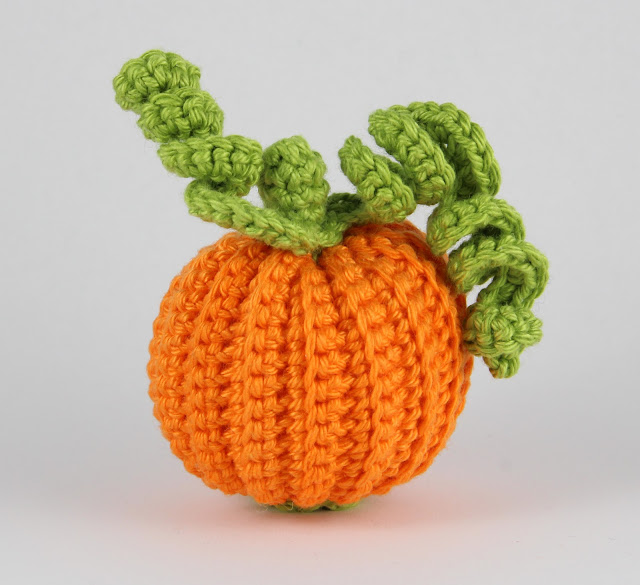
Small pumpkin (free pattern)
The bodies of these pumpkins are crocheted in rows, not in the round. The tops and bottoms in green are crocheted using the in the round technique.
Small pumpkin:
Body:
R1. Ch 17 in orange (17)
R2. Starting with the 2nd stitch of the hook, sc into the "backbump" of every stitch . Ch 1 (16)
R3-34. Sc into every stitch in back loops only. Ch 1 (16)
Fasten off and leave a long tail for sewing. Use this tail to sew the two short ends together. Then fold the pumpkin inside out.
Cut of two lengths of yarn and weave each one into the long sides of the crochet work and pull them tight to squeeze the rectangle into a sphere. Stuff with fiberfill and tie down the ends and weave in.
Top:
Start a magic ring in green.
R1. Sc 6 in the magic ring (6)
R2-3. Sc into every stitch (6)
R4. Sc2 into every stitch (12)
End with a slip stitch and fasten off, leaving a long tail. Use this tail to sew the stalk onto the top of the pumpkin.
Top with vines:
Start a magic ring in green.
R1. Sc 6 in the magic ring (6)
R2-3. Sc into every stitch (6)
R4. Sc2 in the first 3 stitches, ch 25 and sc2 in every chain from the 2nd stitch of the hook. Sc2 into the next stitch of the previous round, then ch 40 and sc2 in every chain from the 2nd stitch of the hook. End the round by sc2 into the remaining 2 stitches and fastening off with a slip stitch. Sew onto the top of the pumpkin with the tail.
Bottom:
Start a magic ring in green.
R1. Sc 6 in the magic ring (6)
R2. Sc2 into every stitch (12)End with a slip stitch and fasten off. Sew on.


Comments
Post a Comment