Posts

Wild West scene (free pattern)

Image
I thought it would make for a nice change from the usual toys and amigurumi I usually post here to make a little piece of scenery. This was all triggered when I got obsessed with the chevron or wavy stitch (see earlier post here ), which I initially practiced in some scrap sand-coloured yarn. Perfect for a little desert scene... I've used cotton SMC Catania yarn, suitable for a 2.00-2.50mm hook for all elements. For the main stem of the cactus, start a magic ring in green. R1. sc 6 in the magic ring (6) R2. 2sc in every stitch (12) R3-22. sc in every stitch (12) Fasten off with a ss and leave a tail for sewing.    For the "arms", start a magic fing in green.  R1. sc 6 in the magic ring (6) R2. 2sc in every 2nd stitch (9) R3-6. sc in every stitch (9)   The next 5 steps will be crocheted in rows, not rounds.  R7. ch 1, turn, sc 5 (5) R8. ch 1, turn, sc2tog, sc 3 (4) R9. ch 1, turn, sc2tog, sc 2 (3) R10. ch 1, turn, sc2tog, sc 1 (2) R11. ch 1, turn, sc2tog (1) ...

Pterodactyl

Image
As part of my Jurassic Park obsession, I've been making some dino-amigurumi lately, and Complicated Knots on YouTube has made some terrific patterns for a variety of dinosaurs.  Her pterodactyl pattern is really amazing and requires no sewing, so that's a big plus for me! The wings curl up on their own because they are lined with sc stitches along the sides, but they're malleable enough to make different arrangements.  These would make for perfect gifts for a dino-obsessed child, but their equally cute just to make for yourself :-) Just look at its little snout!

T-rex

Image
 Another one of Complicated Knots ' brilliant dino-creations: the mighty T-rex. Although this one looks like he needs a cuddle ;-)  I had some difficulty with the puff stitch, I think this is more difficult to do neatly with cotton yarn (she uses acrylic, which is much more pliable). But they do add a lovely effect to his back. Without the dots, he would be quite plain. He's a little wonky on his feet, because i sewed those on while on a train, but you can manipulate them into different positions, which is cool. And finally, another show of his back, to show off those puff stitches that I just couldn't get right...But I would sooner throw out my hooks than switch to acrylic yarn!

Sea creatures (free patterns)

Image
Sometimes I get obsessed with a particular type of stitch or technique and I have to work it into everything. Lately, I have been in love with the chevron stitch, which gives a really lovely wave pattern in your work. There is something very satisfying about crocheting to dc together I find. And the chevron stitch makes for a perfect backdrop for some ocean critters <3 I've used cotton SMC Catania yarn, suitable for a 2.00-2.50mm hook.   Ocean waves: In blue, ch a multiple of 12 + 3 (I've done 51 here, 48 for the pattern and 3 for the turn chains). This part of the pattern is crocheted in rows. R1. dc into the 4th ch from the hook (skipped stitches count as 1 dc), then repeat [dc in the next 3 stitches, 2dc2tog, dc in the next 3 stitches, 2dc in the next 2 stitches] until the final ch in which you put 2 dc.  From now on, all rows are crocheted in BLO R2. ch 3 (counts as a dc), dc in last dc of the previous row, then repeat pattern [dc in the next 3 stitches, 2dc2tog, dc in ...

Ankylosaur

Image
 I re-watched the Jurassic Park films recently and wondered if anyone had made some good amigurumi patterns. And Complicated Knots on YouTube definitely has! She has made a range of different dino types, and all for free <3 The ankylosaur has long been my favourite, possibly because it's basically a weaponised armadillo. I have a weakness for animals that are built for defense (turtles rule) and the ankylosaur just takes this concept to the next level. The use of what Complicated Knots calls the waffle stitch for the armour is simply inspired and it made me fall in love with the front and backpost dc, a type of crocheting I had mostly avoided up to now. 

Archaeorumi I: Unguentaria

Image
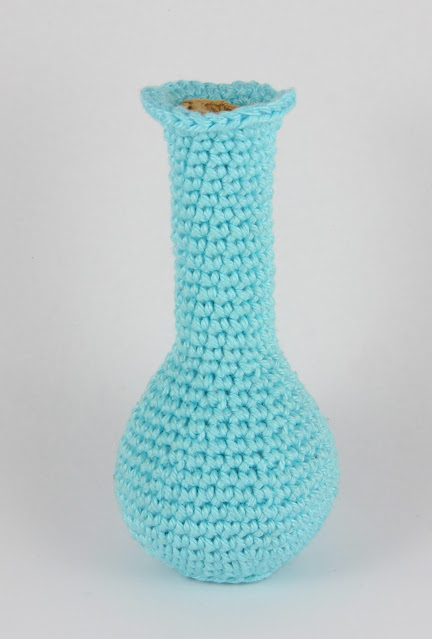
Right, so I appreciate that this might be a little too niche for most people, but I've been trying to design archaeologically themed amigurumi. In my day to day life, I work as an archaeologist, mostly on finds (little field work for me these days) and I specialise in Roman pottery and small finds.  Roman glass isn't something I know an awful lot about, especially because it is so rare to find, let alone in a complete state. I have always found unguentaria quite charming though, the little medicine bottles that contained oils, make-up and other items used for dressing and treating the body. There are some really fun studies out there that did chemical analysis on remaining contents found in some of these Roman bottles and I've always dreamed of recreating the make-up recipes that Ovidius wrote up in his Medicamina Faciei Femineae (the book shown in the picture). Just a shame that almost all recipes contain things we now know are terribly toxic. Like lead :-) And how on eart...

Archaeorumi I: Unguentarium type 2

Image
Unguentarium type 2: Start a magic ring in green. R1. Sc 6 into the magic ring (6) R2. Sc2 into every stitch (12) R3. Sc2 in every 2nd stitch (18) R4. Sc2 in every 3rd stitch (24) R5. Sc2 in every 4th stitch (30) R6-9. Sc into every stitch (30) R10. Sc2tog every 9th and 10th stitch (27) R11. Sc into every stitch (27) R12. Sc2tog every 8th and 9th stitch (24) R13-14. Sc into every stitch (24) R15. Sc2tog every 7th and 8th stitch (21) R16-17. Sc into every stitch (21) R18. Sc2tog every 6th and 7th stitch (18) R19-20. Sc into every stitch (18) R21. Sc2tog every 5th and 6th stitch (15) R22-23. Sc into every stitch (15) Finish round 23 with a slip stitch.  R24. Ch 1, 2hdc in every stitch (30) Finish round 24 with a slip stitch and fasten off. Weave in ends.  Small stopper: Start a magic ring in contrasting colour.  R1. Sc6 in magic ring (6) R2. Sc2 in every stitch (12) R3. In back loops only, sc in every stitch (12) R4. In back loops only, sc in every stitch (12)  R5. Sc2...

Archaeorumi I: Ungentarium type 1

Image
Ungentarium type 1: Start a magic ring in light blue  R1. Sc6 in magic ring (6) R2. Sc2 in every stitch (12) R3. Sc2 in every 2nd stitch (18) R4. Sc2 in every 3rd stitch (24) R5. Sc2 in every 4th stitch (30) R6. Sc2 in every 5th stitch (36) R7. Sc2 in every 6th stitch (42) R8. In back loops only, sc in every stitch (42) R9-11. Sc in every stitch (42) R12. Sc2tog every 13th and 14th stitch (39) R13. Sc2tog every 12th and 13th stitch (36) R12. Sc2tog every 11th and 12th stitch (33) R13. Sc2tog every 10th and 11th stitch (30) R14. Sc2tog every 9th and 10th stitch (27) R15. Sc2tog every 8th and 9th stitch (24) R16. Sc2tog every 7th and 8th stitch (21) R17. Sc2tog every 6th and 7th stitch (18) R18. In front loops only, sc in every stitch (18) Weave a separate length of thread through the back loops and pull. Tie off.  R19-31. Sc in every stitch (18) R32. 2dc in the first 17 stitches. In the last, crochet 1 dc and hdc. Close with a slip stitch and fasten off.  Weave in ends....

Archaeorumi I: Unguentarium type 3

Image
Unguentarium type 3:  Start a magic ring in light blue  R1. Sc6 in magic ring (6) R2. Sc2 in every stitch (12) R3. Sc2 in every 2nd stitch (18) R4. Sc2 in every 3rd stitch (24) R5. In back loops only, sc in every stitch (24) R6. Sc2 in every 4th stitch (30) R7. Sc2 in every 5th stitch (36) R7. Sc2 in every 6th stitch (42) R8-11. Sc in every stitch (42) R12. Sc2tog every 6th and 7th stitch (36) R13. Sc in every stitch (36) R14. Sc2tog every 5th and 6th stitch (30) R15. Sc in every stitch (30). Start filling the body.  R16. Sc2tog every 4th and 5th stitch (24) R17. Sc in every stitch (24) R18. Sc2tog every 3rd and 4th stitch (18) R19. Sc in every stitch (18) R20. Sc2tog every 5th and 6th stitch (15) R21-35. Sc in every stitch (15) R36. Sc2 in every 5th stitch (18) R37. Sc2 in every 3rd stitch (24) R38. Sc2 in every 4th stitch (30). Fasten off with a slip stitch and weave in tail.  Small stopper: Start a magic ring in contrasting colour.  R1. Sc6 in magic ring (6) ...

Snake

Image
A cute little snake from a book on alphabetical amigurumi.  He is made from dark and light green SMC Catania Original (and some left-over red yarn for the tongue) with 6mm brown/black safety eyes. His body contains a pipe cleaner so he can slither properly, although part of the zigzag form is crocheted in.     Text    

Evil pumkin

Image
Just a cute, evil-looking pumpkin as part of my annual Halloween decorations. The pattern used is by Tessa van Riet-Ernst ( https://woolytoons.com/ ).     If you want to go for a more grown-up look for your autumn decorations, I've written a pattern for some less cartoony pumpkin decorations here .     Text  

Guinea pig

Image
My husband is a big fan of all rodents (guinea pigs and capybara in particular), so ever since I started crocheting animals he has been asking for one of those.  It took me a really long time to find a pattern of a guinea pig I liked and this is it. Unfortunately not in the three colour pattern that is my favourite, but still mighty cute.   This cute little rodent is made from 100% cotton by Ricorumi in light brown, white and pink (for the nose) with 9mm black safety eyes. The pattern is by Christel Krukkert (ISBN 978 94 6250 106 5). And for scale: a small Trabant toy car. Of course.

Crochet bag (free pattern)

Image
This project was originally conceived as a rainbow-themed handbag, but ended up as a bag that I keep my current crochet projects in. I've been crocheting a lot lately, and it helps keep the living room clean from bits of yarn, half-finished projects and needles.    The bag is made up of separately crocheted circles that are then sewn on top of each other. For each circle, start with a magic ring. All elements are made of SMC Catania cotton yarn for a 2-2.5mm hook.   R1. 10 dc in the magic ring (10) R2. 2dc in every stitch (20) R3. 2dc in every second stitch (30) Fasten off with a slip stitch and weave in ends.    Make as many circles in as many colours as you like.  Sew them onto each other with the rims of the next circle just touching the tops of the stitches in tour 1 of the previous circle. Make two of these swatches, one for each side of the bag. To turn your rectangle of circles into a proper bag, fasten on with white or any other contrasting colour a...

Wolf

Image
Again, a pattern I picked up on amigurumipatterns.net, this time by YukiYarn Designs ( https://www.amigurumipatterns.net/shop/YukiYarn-designs/Boris-the-Wolf/ ). As Boris turned out the be really quick and easy to crochet and I had lots of yarn left, I decided to make him a friend. This pattern was my first experience with crocheting in different colours (it had always scared my off), but I was surprised at how easy it was.  For extra cuddliness, Boris is made of merino wool (Scheepjes Merino Soft) with a 3-4mm. hook.  Body dark: 605 Hogarth Body Light: 604 Lowry Details: 601 Pollock Eyes: 6mm. brown safety eyes       Text

Kokeshi doll

Image
One of the first things I bookmarked on when I started my crocheting blog on DeviantArt was a pattern for cute little kokeshi doll amigurumi by SuniMam . The free pattern is by someone on Tumblr (to be found here )  and can be adapted in a multitude of ways. I prefer mine blue and relatively simple, but you can add an obi, flowers, etc. Because I'm lazy and completely crap at embroidering details, the eyes are sewing pins :-)