Posts

Showing posts from December, 2021

Roman legionary soldier

Image
Some time ago, I changed PhD supervisors, which was a massive development for me. I wanted to thank my outgoing supervisor for all their help and advise and spent some time thinking of a suitable, meaningful present. Seeing as we're both Roman archaeologists specialised in military sites, I settled on the idea of making a Roman legionary amigurumi (which upon receiving, they promptly christened Marcus).  This is the end result: Marcus the Roman legionary, finished project Marcus' design really is a mix of two patterns, one written by Lucy Collins and the other by Laura Wilson Designs . The first is for a very small and stylised Roman soldier, while the other is for a relatively large and very detailed Spartan warrior. It took some time adapting and matching the two patterns, picking bits of one or the other and improvising the bits in between to arrive at a "cohesive" doll that looked right.  Marcus the Roman legionary, finished project I'm extremely happy with t

Christmas tree

Image
These little Christmas trees look amazing, but are in fact really easy and quick to make. They're from a pattern by The Lazy Hobby Hopper . The brown stumps are my own humble addition. I personally use them as amigurumi to stand around the foot of my Christmas tree, but for a friend I added loops of yarn to turn them into tree decorations (if you want to go meta).    For the stump, start a magic ring in dark brown.  R1.sc 6 in the ring (6) R2. 2sc in every stitch (12) R3. 2sc in every second stitch (18) R4. 2sc in every third stitch (24) R5. in backloops only, sc in every stitch (24) R6. sc in every stitch (24) R7. sc2tog every 11th and 12th stitch (22).  Fasten off and use the tail to sew the tree to the trunk.  For both parts, I used SMC Catania cotton yarn in the colours green (412) and brown (157). Both tree and stump may be filled with a little bit of fiberfill, but you won't need much.   

Snowman Christmas ornament

Image
 This one is perhaps my favourite Christmas ornament of all the kitschy stuff in my tree. This adorable little snowman may also function perfectly as an amigurumi, but if you give him a loop through his head you can hang him in a tree just as well. The pattern used is by the talented and very brilliantly named Repeat Crafter Me . This particular snowman is made from SMC Catania cotton in white (106), black (110), orange (281) and blue (146). The eyes and buttons are 6mm safety eyes. 

Rudolph the red nosed reindeer Christmas ornament

Image
Yet another Christmas ornament, and again one designed by the brilliant Sewrella  (see link for a free PDF of the pattern!).  This Rudolph was made of SMC Catania with a 2.00mm hook in the colours dark brown (157), camel (179) and red (424) with two 6mm safety eyes. 

Christmas hats ornament

Image
These little Santa hats are incredibly quick and easy to make and are really useful to use up leftover bits of yarn. The pattern I used is in Spanish, but the video is easy enough to follow by just pausing it and following the steps.  These are made as ornaments to hang in a tree, but they are easily adaptable to give an amigurumi of your choice a Christmassy accessory. Size is of course also influenced by yarn weight and hook size. These tiny hats are just big enough to fit on your finger and are made with SMC Catania cotton in red (424) and white (106). 

Gingerbread man ornament

Image
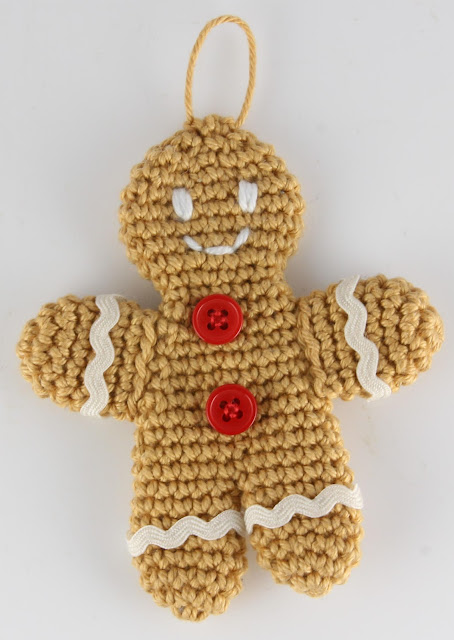
Another ornament from my tacky Christmas tree is this cute little gingerbread man by the brilliant I Heart Gantsilyo . Do send them some love if you make one for yourself!  This little fellow was made from camel SMC Catania (179) with a 2.00mm hook. The decorative details can be made of whatever you want really. The eyes and mouth here are made of scraps of white SMC Catania yarn and the other decorative details are some spare buttons and bits of decorative ribbon. 

Miro the Ant (free pattern)

Image
This ant was the first amigurumi pattern I ever wrote, around 3 or 4 years ago. It is made of simple spheres sewn together to resemble an ant's body. Simple, but effective, if I may say so myself. Whether anyone is interested in crocheting ants is a completely different matter :-) The yarn used was some acrylic DK knitting yarn with a 3.00mm hook in dark brown for the body. The eyes and anteanne are made from SMC Catania cotton in white and black with a 2.5mm hook.   Head and body (make two):   With brown yarn, start a magic ring R1. 6sc in ring (6) R2. 2sc in every sc (12) R3. 2sc in every 2nd sc (18) R4. 2sc in every 3rd sc (24) R5. 2sc in every 4th sc (30) R6. 2sc in every 5th sc (36) 7.-11. 36sc (36) R12. sc2tog every 5th and 6th sc (30) R13. sc2tog every 4th and 5th sc (24) R14. sc2tog every 3rd and 4th sc (18) R15. sc2tog every 2nd and 3rd sc (12) R16. sc2tog every 1st and 2nd sc (6)   End with a slip stitch in the 1st sc and fasten off. Leave plenty of yarn for sewing. Tail

Ramses the Mummy

Image
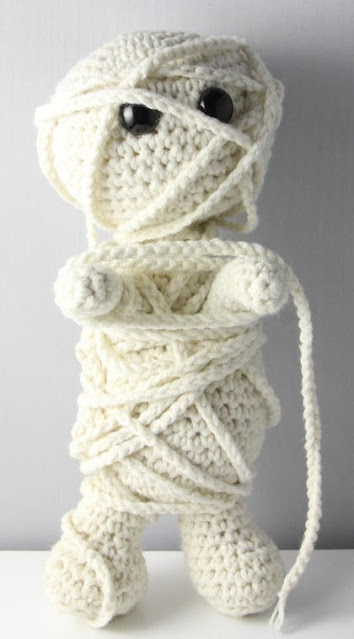
This may very well have been my first ever crochet project, taken from a book on monsters and creatures by Tessa van Riest-Ernst . At the time, I was not yet comfortable swapping yarns or adapting patterns and I remember going to loads of different shops to get the specific types of yarns she mentioned in her pattern.  Looking back at it, I can spot all the mistakes I made. The stitches are too loose, some of the stuffing is visible and the seams where the various parts are sewn together are a bit sloppy. But I wouldn't change this little mummy for the world, because he's cute as he is and he shows me how much I've improved over the years as a crocheter. Also, he has firmly found his place in our living room hiding between my husband's classic horror DVD's.  Ramses is made with a 3.00mm hook and some cream-coloured Scheepjes Softfun (2426). The eyes are black 6mm safetey eyes. The body and head are stuffed with fiberfill and the legs and arms with a combination of

Koffing (free pattern)

Image
Yet another Pokémon from the classic series that is easily turned into a crocheted form is Koffing, the purple sphere that can excrete poison fumes and evolve into Weezing. The only real challenge here was to come up with believable tubes, as Koffing's body can be made using a standard pattern for a sphere.  The tubes are a little big and I think there ought to have been more, but it's an amigurumi and it's the cuteness that matters. Again, my laziness and fear of mucking things up by embroidering badly have meant that all the other details are glued on felt.  Koffing was made from my staple cotton amigurumu yarn SMC Catania in dark purple (113) with felt details in white, black, red and light brown. To make sure that the stitchtes are tight and don't show any fiberfill stuffing, I've used a 2.00mm hook.   Body: In purple, start a magic ring. R1: sc 6 in the ring (6) R2: 2sc in every stitch (12) R3: 2sc in every 2nd stitch (18) R4: 2sc in every 3rd stitch (24) R5:

Goomba (free pattern)

Image
During the first lockdown Christmas, my husband rediscovered his old NES and we spend some great afternoons stomping on turtle shells, fitting brightly coloured pills around viruses and solving puzzles with Lolo. I knew I had to make some Nintendo-themed amigurumi to go along with this craze.  Those evil Goomba's are bloody annoying in-game, but really easy to turn into crochet forms. The facial details could have been done better, but embroidering fine details are not my strong suit! All elements are made of SMC Catania yarn (2-2.5mm).  Head: In dark brown, start with a magic ring. Round 1: sc 6 in magic ring (6) Round 2: 2sc in every sc (12) Round 3: 2sc in every 4th sc (15) Round 4: 2sc in every 5th sc (18) Round 5-6: sc 18 (18) Round 7: 2sc in every 3rd sc (24) Round 8: sc 9, 2sc in the 10th, 11th and 12th sc; sc 9, 2sc in the 22nd, 23rd and 24th sc (30) Round 9: sc 12, 2sc in the 13th, 14th and 15th sc; sc 12, 2sc in every 28th, 29th and 30th sc (36) Round 10: 36 sc (36) Round

Diglett (free pattern)

Image
Diglett was my favourite Pokémon as a kid, although Ditto was a close second. It's the simplicity of its tubular body and the cute little eyes I think that makes this a perfect creature. These characteristics also make it a very good candidate for the amigurumi treatment.  There are many adorable crocheted Diglett's on the internet, such as this incredible Ravelry pattern  and this pattern by Yvonne of Originals Lab . What I specifically wanted to achieve for my rendition of this mole Pokémon was that it really looked as if it was coming out of the soil. I also like to avoid sewing and embroidering as much as possible, so the eyes are made of felt and the entire Diglett is knitted as one (apart from the nose).  Diglett was made from SMC Catania cotton yarn with a 2.00mm hook in the colours dark brown (157), pink (114) and light brown (179). For the stuffing I would recommend putting some plastic beads in the bottom and filling the rest with fiberfill. The eyes in this one are m

Wobuffet (free pattern)

Image
To improve our German language skills, my husband and I started watching the newish Pokémon Sun and Moon series on Netflix with German dubbing some time ago. Having grown up with the original Pokémon series, nothing prepared me for how old I would feel seeing all these newfangled Pokémon I had never heard of...  I did fall in love with some of them though, such as Togedemaru. She's basically an improved Pikachu in the electric mouse category, although this has proven to be surprisingly controversial with my husband (an ardent Pikachu fan).  I also very much enjoyed the weirdness of Wobuffet, one of the Poké-henchmen of Team Rocket. In the German dubbing, he's called Woingenau, a slight misspelling of "wohin genau", which literally translates as "whereto exactly". And it's just really funny when he overenthusiastically shouts "exactly, exactly" whenever they're planning something dastardly. As always, this amigurumi is made with a 2.00mm hoo

Christmas wreath ornament

Image
This simple Christmas wreath is a perfect way to use up left-over bits of yarn and may be made from a variety of different colours. The pattern is by Creative Crochet Workshop .  For this one, I used SMC Catania cotton in the colours green (412), white (106) and red (424). 

Christmas angel ornament

Image
This is definitely the fanciest thing I've ever crocheted. My style is usually more on the cute or cartoony side and for a while, this angel looked a little out of sorts in my Christmas tree. This incredibly impressive looking, but relatively easy to make pattern is by Oombawka Design Crochet . Their website is definitely worth a look around, as they make many more great angel ornaments.  Because of the open-work in the skirt, I wanted a relatively clean look and opted for cotton ( SMC Catania ), in white (106) with a fairly small hook size (2.00mm). 

Pride rainbow (free pattern)

Image
If you want to show your support for the LGBTQ+ community, or just like rainbows, I figured a little patch to sow onto bags or clothing would be ideal. This simple little pattern can be made from scraps of any type of yarn as long as all the main colours of the rainbow are there. For size, it is also more advisable to use a thinner yarn and for sturdiness I would recommend cotton over wool or acrylic (end result would be quite floppy).  For this pattern I had some SMC Catania in various colours available (see list at end of pattern), but only managed 6 out of the 7 colours, although personally I do think the division of blue and indigo is a bit of a scam.   Start by chaining 15 in purple (15). Row 1: sc in the second stitch from the needle; (2sc in the next stitch, sc in the next to stitches) x2; (sc in the next to stitches, 2sc in the next stitch) x2; 1sc in the last stitch (18). Chain 1 to turn. Row 2: (sc in the next 3 stitches, 2sc in the next stitch) x2; sc in the net 2 stitches;

Christmas mushrooms

Image
My parents had one box of fancy glass-blown Christmas decorations that we put in our tree each year and for some reason, these included some mushroom-shaped baubles. Sure, the fly agaric has Christmassy colours with its red cap and white dots, but otherwise I always associated mushrooms and funghi with autumn, not winter.  I just always assumed we were peculiar in this, until my favourite crocheting magazine ran these cute little mushroom amigurumi decorations. Apparently, fly agarics at Christmas time is a thing? If anyone knows why, please let me know! I think the original pattern suggested to stick on some white dots on the caps, but I think I prefer them plain for a slightly more sophisticated look. Not to suggest that my Christmas decorations are anything but a cobbled-together heap of cute and weird, but some appearances must be kept up :-) These are made with a 2.00mm hook and my favourite amigurumi yarn, cotton SMC Catania in the colours red (300) and white (106) and a little

Valentine's Day heart

Image
3D hearts are incredibly easy and quick to crochet, and any basic pattern can be scaled up or down without any difficult maths. For this little heart, I used cotton yarn ( SMC Catania ) with a 2.00mm hook. To start, make a magic ring in the colour of your choice.  Round 1: sc 6 into magic ring (6) Round 2: sc2 in every stitch (12) Round 3: sc2 in every 2nd stitch (18) Round 4: sc in every stitch (18) Fasten off and leave a long tail.  Make a second one, but don't fasten off. Fix the two halves together with a sc. Round 5: sc 15, skip 2 stitches, sc 16 (32). Sew up the middle section with the tail.  Round 6: sc in every stitch (32) Round 7: sc 6, sc2tog x2, sc 12, sc2tog x2, sc 6 (28) Round 8: sc 5, sc2tog x2, sc 10, sc2tog x2, sc 5 (24) Round 9: sc 4, sc2tog x2, sc 8, sc2tog x2, sc 4 (20) Round 10: sc 3, sc2tog x2, sc 6, sc2tog x2, sc 3 (16) Round 11: sc 2, sc2tog x2, sc 4, sc2tog x2, sc 2 (12) Stuff. Round 12: sc 1, sc2tog x2, sc 2, sc2tog x2, sc 1 (8) Round 13: sc2tog x4  (4) Fas

Witch with black cat

Image
As a child and young adult, I always wanted to learn how to crochet, but never had the courage to try it (my mother always said it was really difficult). As a result, I always muddled along knitting and embroidering (neither of which I was particularly good at), but never daring to venture into the magical realm of the crochet hook. Until I saw a book by the brilliant Dutch designer Tessa van Riest-Ernst with all these cute little crocheted monsters and creatures and I knew I had to get over my fears. And, as it turned out, my mother was absolutely demonstrably wrong and my love of crocheting was awakened.  This witch with cat pattern was the final pattern in the book, and by the looks of it the most complicated. Again, it took me a few years to attempt it and I'm really happy with how they turned out. The cat, with its forlorn eyes, is especially amusing.   I'm also really pleased with how the hair turned out, I was a little sceptical at first that it would cover the entire h

Christmas stocking ornament

Image
This miniature Christmas stocking has been a big hit with the few visitors to our home we've been allowed to have this year and I've been busy making them for everyone! They're made from a very easy to follow pattern by Sewrella that you can access for free <3 You can also make these in one colour with contrasting toes and heels, but I think the stripey pattern is quite festive and reminiscent of candy canes. You can scale them up or down of course by choosing thicker yarn, but these are made of scraps of my staple amigurumi yarn SMC Catania in the colours red (300) and white (106) with a 2.00mm hook. You can sew them shut at the top, but I've stuffed them with a little bit of fiber fill.  This same  post , and many other patterns can also be found on my  DeviantArt   

Christmas baubles (free pattern)

Image
As a quick and easy filler in my Christmas tree I rustled up these chrochet Christmas baubles. They consist of a small fitting and a basic sphere pattern made with two colours crocheted in a spiral.  These are made from scraps of SMC Catania yarn in the colours 300 (red), 412 (green), 179 (light brown) and 106 (white) with a 2.00mm hook.   Fitting: R1. Sc6 in a magic ring (6) R2. Sc6 in backloops only (6) R3. Sc6 and fasten off. Leave tail for sewing.  Bauble: R1. Sc3 of your first colour and 3 of your second colour in a magic ring (6) R2. Sc2 with first colour in the 1st, 2nd and 3rd stitch, pick up second colour and sc2 in the 4th, 5th and 6th stitch (12, 6 of each colour)  R3. Sc2 in every second stitch (9 of each colour) R4. Sc2 in every 3rd stitch (24, 12 of each colour) R5. Sc2 in every 4th stitch (30, 15 of each colour) R6. Sc2 in every 5th stitch (36, 18 of each colour) R7-12. Sc in every stitch (36) R13. Sc2tog every 5th and 6th stitch (30, 15 of each colour) R14. Sc2tog ever

Christmas elf ornament (free pattern)

Image
It looks slightly macabre to have just an elf head in your tree, but they're quick and easy and a great way to use up ends of yarn. I just can't quite remember how I did the hat.... Everything is made of SMC Catania yarn with a 2-2.5mm hook, as well as two 8mm safety eyes.  For the head, start with a magic ring R1. Sc 6 (6) R2. Sc2 in every stitch (12) R3. Sc2 in every 2nd stitch (18) R4. Sc2 in every 3rd stitch (24) R5. Sc2 in every 4th stitch (30) R6. Sc2 in every 5th stitch (36) R7-12. Sc in every stitch (36) Put in safety eyes.  R13. Sc2tog every 5th and 6th stitch (30) R14. Sc2tog every 4th and 5th stitch (24) R15. Sc2tog every 3rd and 4th stitch (18) R16. Sc2tog every 2nd and 3rd stitch (12) R17. Sc2tog every 1st and 2nd stitch (6) Fasten off and sew shut.  Ears (x2): sc 3 in magic ring and fasten off. Sew onto the side of the head.  Nose: Sc 3 in magic ring.  R2. Sc2 in every sc (6). Fasten off and sew below eyes.  The hat is made of rings of double crochets (dc). Chain